
How to Build an Amadinda
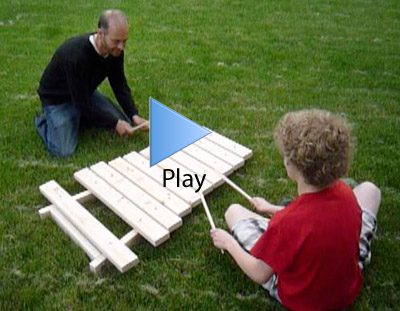
Paul and Dan playing the Amadinda (yes, we know a key is missing). It was Dan’s first time seeing an Amadinda. We recruited him to demo a simple duet. Pretty good for his first attempt!
This page is a simple How-To guide providing instructions for building an Amadinda. Since there are many excellent web pages that describe the history of Amadindas, we focus this page on how to build one. We did not set out to write instructions, but after some searching on the Internet, found a lack of do-it-yourself guides for constructing our own. So… here we are. As a scientist, I needed to explore the physics and formulae first. However, after we cut our first few keys, based on our computations, we realized that important variables such as the speed of sound in our particular 2x4s were difficult to estimate. Our initial spreadsheet provided a useful guide and intuition about the keys, but we determined practical considerations and rules of thumb were sufficient to write up a How-To. For those interested in the science behind vibrating bars we recommend these links: [1], [2], and [3].
One trip to Home Depot and an afternoon of working and we had an Amadinda in our yard. It is rough, designed for summer camps, young students, or simple instruction. It sounds great.
Supplies & Tools
The tool list is simple: a power chop saw makes cutting fast, but a hand saw would work too. Also needed: a socket wrench for the lag bolts, a hammer, a drill with a variety of bits, and a wood rasp for tuning.
Supplies:
- Five 8-foot (premium) pine 2x4s. Of course, you could also go with a fancier wood, like cedar, spruce, or maple. However, I suggest starting with something simple. In 2013, the cost of the wood was roughly $13
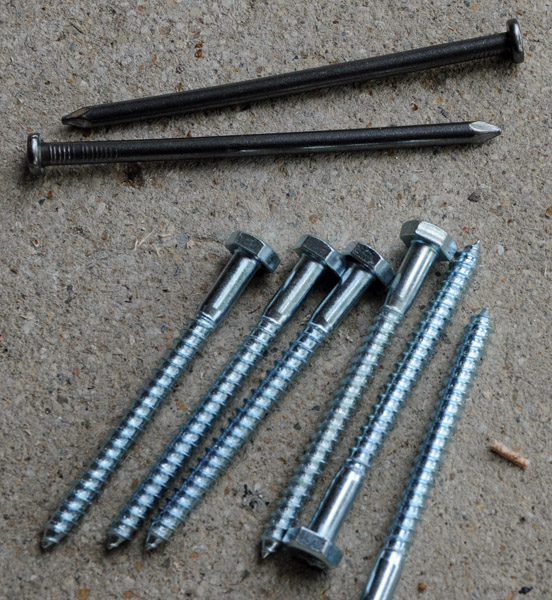
- Eight 1/4″ x 3″ Lag Screws (zinc plated)
- Eight 1/4″ washers
- A 1lb box of 20D (20 Penny) 4″ long “bright common” nails. (24 nails are needed)
- Felt furniture pads (peel and stick). Roughly 25 sq-in, or a roll of felt strip roughly 3ft long.
All together, about $25 in materials is sufficient for a great Amadinda.
Planning
Don’t cut anything yet. These notes are to give you a feel for basic dimensions. You will have to follow the guide below to actually lay out the keys and determine their size. Our Amadinda has 11 keys. The largest key is roughly 32″ long, while the smallest is 1/2 that, or 16″. For our particular type of pine, we tuned from B3 up to B5 (two octaves plus the top note). You could tune starting from a different note or tune things differently if you like. Amadindas are traditionally tuned on a pentatonic scale (5 notes per octave). We built this: B3, D3, E3, F#3, A3, B4, D4, E4, F#4, A4, and B5. The two cross members to connect the rails are approximately 18″ and 6″ long. Use these rough dimensions to help plan your cuts and minimize wasted lumber.
Step 1: Cut the first key
Because the properties of the wood are so difficult to guess, we can’t give you an exact list of cuts and dimensions. Instead, we can explain the process for cutting and tuning keys. Remember, our Amadinda keys ranged from 32″ to 16″. We will start in middle, and add a generous fudge that can be trimmed down to hit your target note. Our middle note, B4, was about 24″ long. So cut your first key at 26″ long. Keys are tuned by laying them on a thin strips of wood that resemble the rails that will eventually support them. The rails should support the key at the “nodes” which are the points where the keys vibrate the least. The nodes will be about 1/4 of the length of the bar from each end. Once the bar is in place, you can begin tuning. Of course, since your wood might be more or less dense than ours, you may end up targeting a note different from B4. Maybe your note ends up being a perfect candidate for B5 or D3. You will have to work that part out. Just remember this is simply a starting point. As you trim wood off the end, the bar will rise in pitch, so this first key could be moved up to any note above it’s initial tone that you like.
Step 2: Tuning
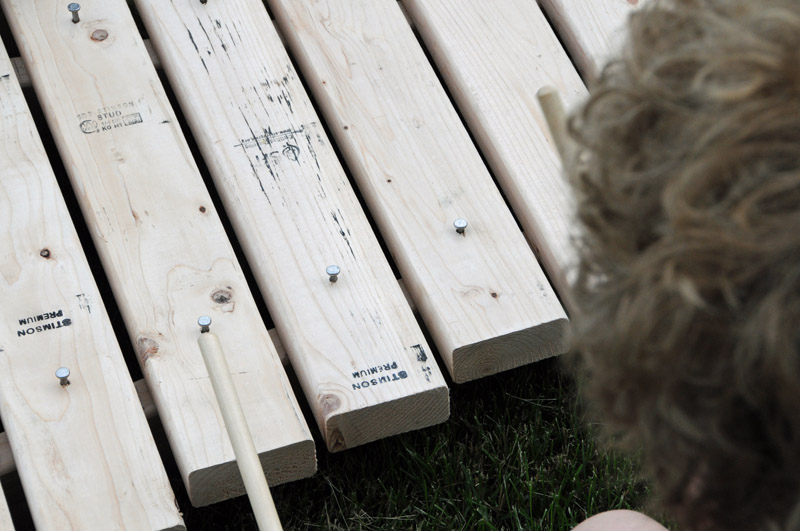
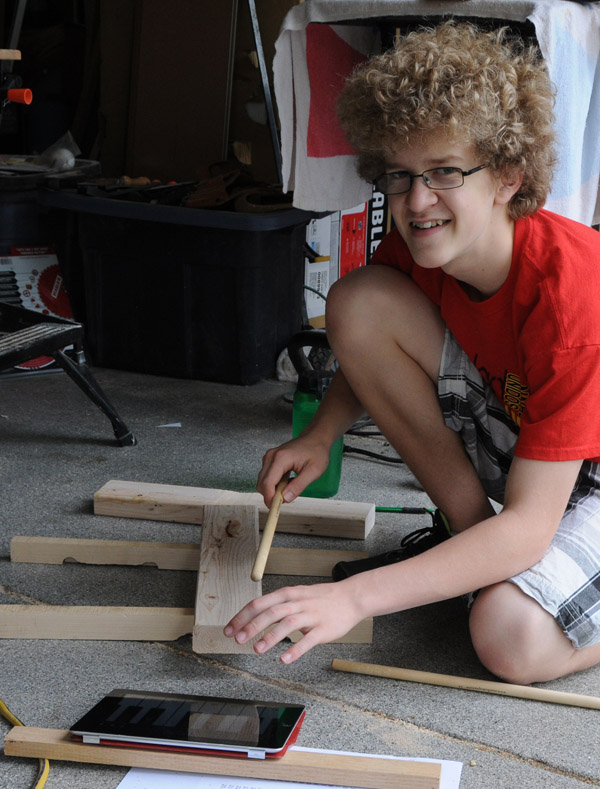
Tuning may sound difficult, but it really is straightforward and learned quickly. With the key resting on two rails (see picture below), strike the top corner of one end sharply with the thick end of a drum stick or a 1″ dowel. You will hear a clear tone.
Strike the end sharply while balanced on two rails
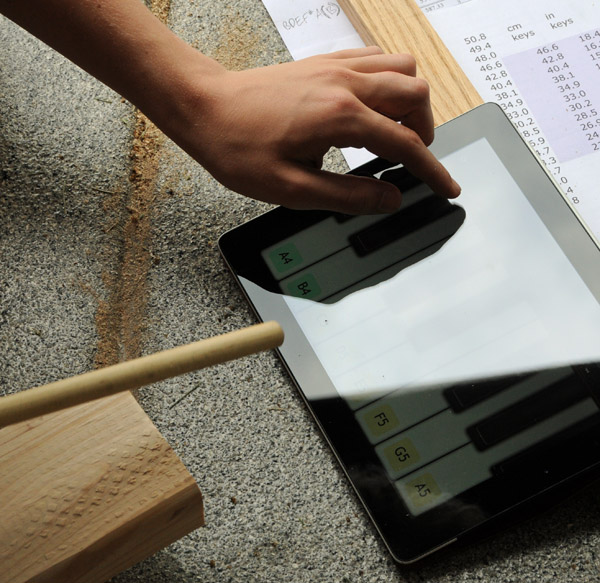
Using an iPad for tuning
We used a simple iPad piano application for our tuning. Find the scale, and start searching for the closest note. You should tune toward a note ABOVE the current tone. Trimming the bar shorter raises the pitch. Go slow! Start by trimming just a 1/4″ or less off the key and then put it back on the rails and strike it again. Remember that the smaller the key, the less wood you need to remove to adjust the pitch. As we got closer to our target note, we were shaving off mere saw blade widths. If you go to far, and your key is sharp of the your target note, you have two choices. A) If significantly sharp of your target (so you will need to lower the key), you may consider just tuning to a higher note in your scale and backfilling the missing key. Otherwise, you can B) rasp the underside, creating a small, gentle arch. This will lower the tone of the key. It is difficult work to lower a key with a rasp, so the further you want to lower the tone of your key, the harder it will be. Of course, if you lower the key too much, you can raise it back up a little by trimming the ends.
So, just to reiterate. trim the ends of the bar slowly to raise the pitch of the key. With a rasp, remove wood from the bottom, forming an arch in order to slightly lower the tone of the key.
The fastest and simplest method for tuning is just to go slow when trimming keys and raising their pitch (no rasping). However, if you must rasp, the pictures below demonstrate lowering the method.
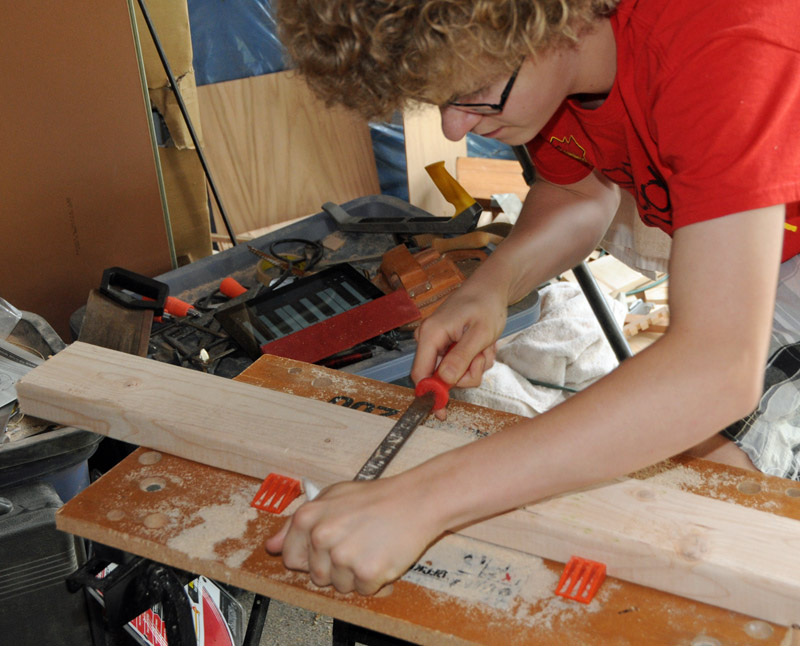
Lowering the key with a bit of arch
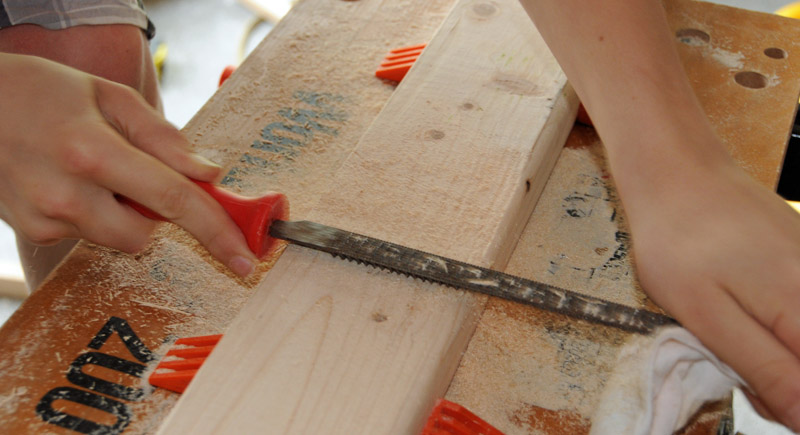
Taking a bit off the underside
Step 3: Cut and Tune the Remaining Keys
Ok. At this point, you should have one tuned key. Next, you want to move slowly up and down the scale from the middle key you just fashioned. The key rule of thumb to remember is that as notes get lower, the size grows rapidly, and as you move up the scale, the keys differ less and less, with each key a similar size. Start by going up the scale, it’s easier. Cut the next key the same size as the one you have just tuned, and then start trimming until you raise it up to your target note (see step 2). In reality, if you want to save wood, you could make each successively higher key a bit smaller, but it’s best if you play it safe until you get a feel for things. Going down the scale, you must length each key. Near the bottom of the scale each key could be 2 to 4 inches longer than the last.
Step 4: Find the Nodes
Congrats. At this point you should be able to lay the 11 keys across some scraps of wood or the remainders of your 2x4s and play the entire 2 octave pentatonic scale. It will sound great! However, your Amadinda will sound best if the keys are mounted exactly on their “nodes”, the points that don’t move when the bars resonate. By mounting at the node points, you won’t lose any volume (dampen) the key when it is struck. If you don’t properly mount the keys, they will have weak tones and little resonance.
Lay a candidate key across two drum sticks or thin scraps, positioning it over the area where the node might be. Sprinkle some salt over the bar end. Then, start striking each end of the bar in turn. Repeat over and over. The salt will dance. It will move off the sections of the bar moving most, and settle on the areas where the wood does not move (the node). See the images below. If you reposition the drum sticks under the salt piles (the nodes) and repeat, you will improve accuracy. Mark the node with a pencil line. Repeat for all the keys.
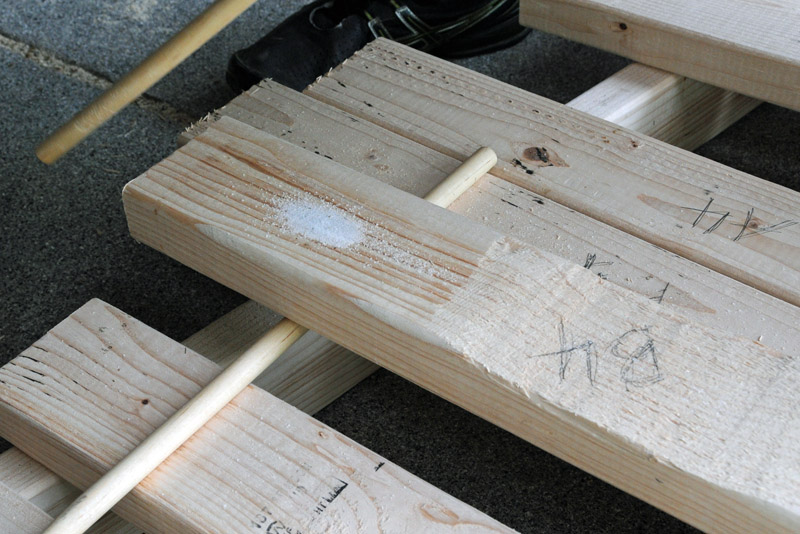
Finding the node
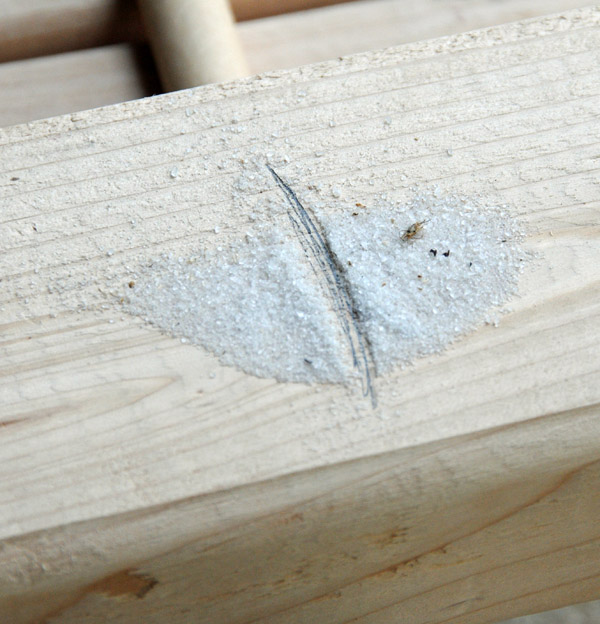
Marking the Node
Step 5: Drill the Holes for Each Key
Start by laying out the Amadinda, attempting to line up the node marks you just finished. We put 1/2 in gap between each key. The keys won’t all line up perfectly, you will have to push and pull the bars into the best alignment you can get. Make it look good. Then draw a heavy (perfectly straight) line averaging all your previous node marks. This will be the line used to drill the holes. Directly under this line will be the supporting rail.
Find a drill bit that is slightly larger than the diameter of your 20 penny nails. When the keys are mounted, they should be free to move, and bounce up and down a bit. So drill a hole about 1/8″ larger in diameter than your nail. The two holes should go through the middle of the key at each node. See the pictures above if you are wondering where the holes must be drilled. With 11 keys and a hole at each end you will have 22 holes total.
Step 6: Build the Frame
Finally, a easy carpenter’s job. Lay the keys back out with a 1/2″ gap between them. Add about 1.5″ to each end and measure the size of your rail. Ours was about 48″. Cut the two 2×4 rails. Then measure the distance between the rails at each end, and cut the pieces of wood. These will be the pieces connecting the rails (cross members). If you want to be precise (and I recommend that), these cross members cannot be cut at 90 degrees. Because of the angles of the rails, you will need to miter the ends of the cross members. For ours, it was about 6 or 7 degrees. There is some good geometry that you can use to calculate the angle precisely if you like. Experiment with your setup, making the cross member snug.
Lay out the cross members. Drill two holes in each rail for the lag screws and into the cross members. The diameter of the holes should be the diameter of the screws without the threads. Use a socket set and put in each lag screw with a washer. In the picture below, I’m attaching the cross member to the small end of the Amadinda.
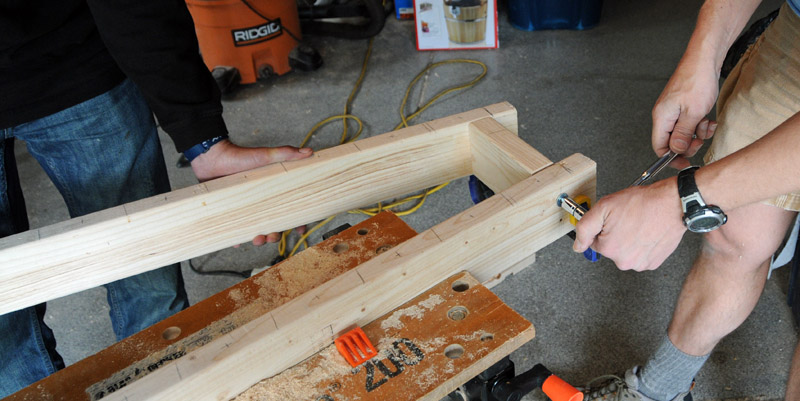
Constructing the Frame
Repeat for the other, larger end of the frame. You can now lay the bars out across your completed frame.
Step 7: Mounting the Keys
Congratulations, you are ready for the last step. Do not simply hammer in those monster nails through the keys and into the rail, it will split. Instead, we need to drill a hole to accept the nail. Using a drill bit slightly smaller than the diameter of nail, use the key as a guide hole and drill through the guide hole and into the rail. Add a bit of the felt strip to the rail on each side of the hole you just drilled (see picture below). This will suspend the rail on the felt pads and prevent buzzing and improve the quality of the sound.
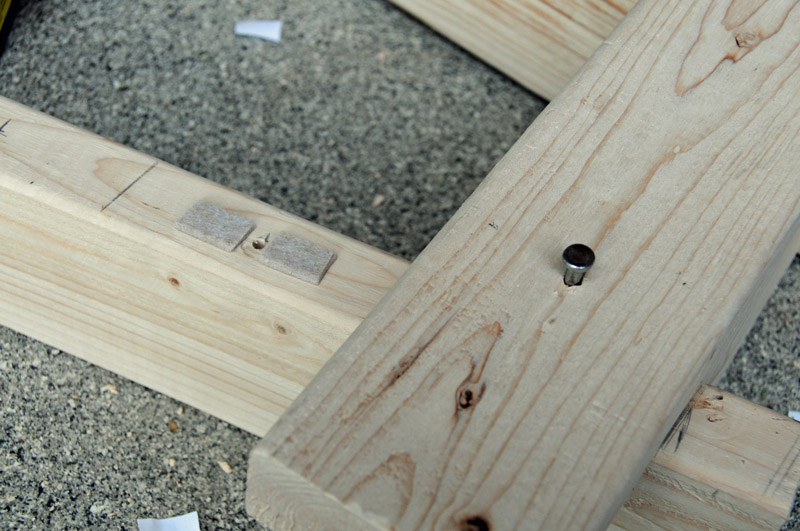
Adding the felt before nailing in the key
Gently pound in the nails, leaving about 1/4″ of the nail protruding. When you are done, the key should have some play — it should be easy to wiggle. If it is tight, see what you can do to loosen things up one way or another.
Step 8: Play your Amadinda!
We were short on wood when we took our pictures, so our Amadinda sports a missing key. It was installed after the pictures. Let us know if you use our instructions to build an Amadinda, and if you have suggestions, let us know.
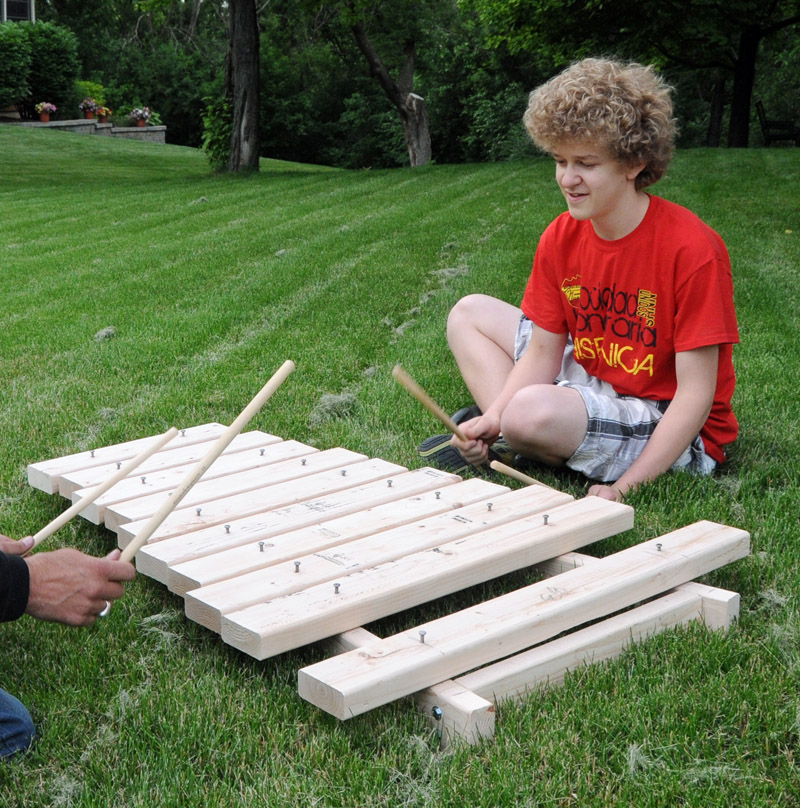
The (nearly) finished Amadinda
I’ve been drilling horizontally through the bars and threading them on starter cord (or window blind nylon cord, about 1/4″ or 6mm) . The instrument can then be suspended between posts such as verandah posts. My 4 year olds that I work with have no problems with the shallow curve and the sound is excellent. I had lots of problems with screws and nails buzzing and bars working loose. This thoroughly traditional method has lots going for it.
I’m interested to note that you use 1/4 of the length for the node position. Everybody has been telling me 2/9. I’ve found the node position to be fairly forgiving and, as you do, go for an average.
Thanks for a very useful demo. John Warner. Murrumbateman. NSW. Australia